Let's See How They Improved By Using Our Products
Learn how our customers increase their leads and revenue through personalization and many other features. Check their stories!
Webhook Usage Guide
Here you will learn about Triggers and Actions that use Webhooks in the Flow feature. This webhook is quite classic, so if you have an IT team, tech team or something like that, we recommend having them operate. However, if you have a Marketing team that is familiar with Webhooks, it will be very helpful and will easily understand this guide. Also read our article about Webhooks here.
Basically, a webhook is a link that will be used as a link to send or get data. For example, if you create your own Form and want to integrate it with Flow. Then you need to include the link in the Campaign Flow to your Form so that the data can be integrated.
In the Flow feature, there are 3 parts related to the Webhook, namely Trigger, Filter and Action.
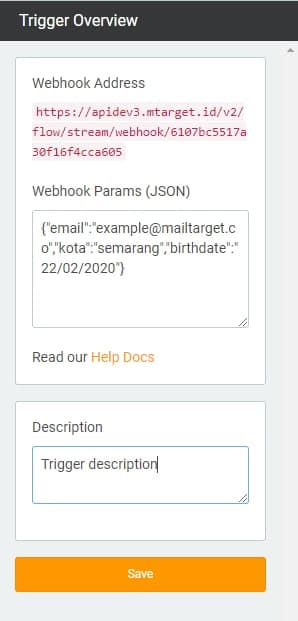
In Trigger, here you will find the Webhook and JSON PARAM columns.
Here you will get a link which is a Webhook. You need to pair this webhook with the POST method. As for JSON PARAM, it is a sample of data that will be entered so that the Flow system can recognize the data. Especially if you want to use filters.
Basically, the PARAM JSON data sample has only two types, namely text and numbers. So only these two types of data are valid for the data sample. The following is an example of each data type.
Text: ` { “email”:”example@domain.com” “Jakarta city” } `
Number ` { “Quantity”:21312 } `
Date ` { “Birthdate”:”02/02/2020” } `
Especially for date (Date), you can enter data like the example above. When you open the Filter, it will indeed be detected as Text. That’s okay, because you just need to select a filter from the ‘Date’ section at the bottom.
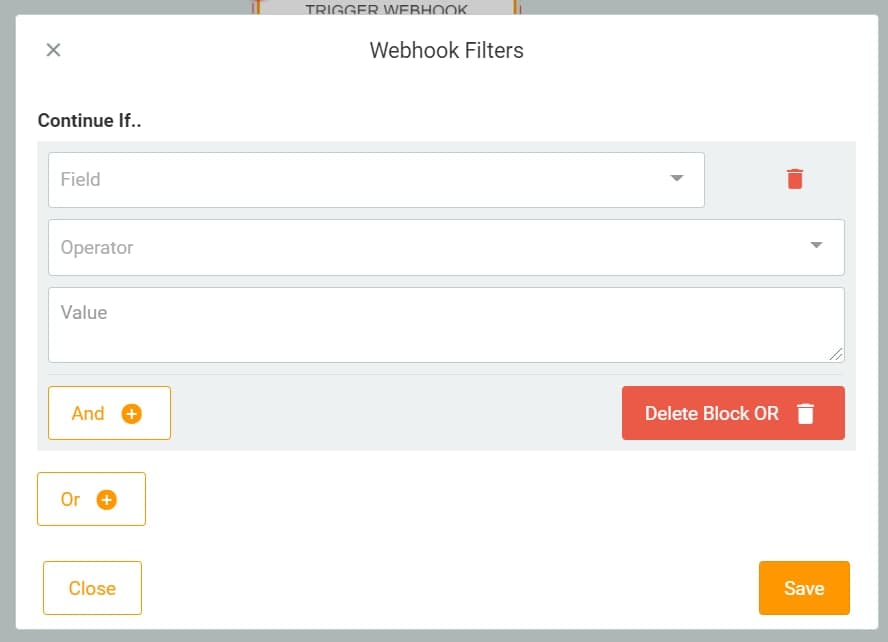
You can use Webhook filters to get data with certain criteria. Make sure that the sample data in the JSON PARAM in Trigger has been filled in correctly, because the data that can be selected in this Filter is sampled from JSON PARAM.
There are 2 types of filtering on Webhook. You can filter with the ‘And’ or ‘Or’ method. The ‘And’ method is for creating value criteria in one data set, while the ‘Or’ method is for creating more than one data criteria to be filtered.
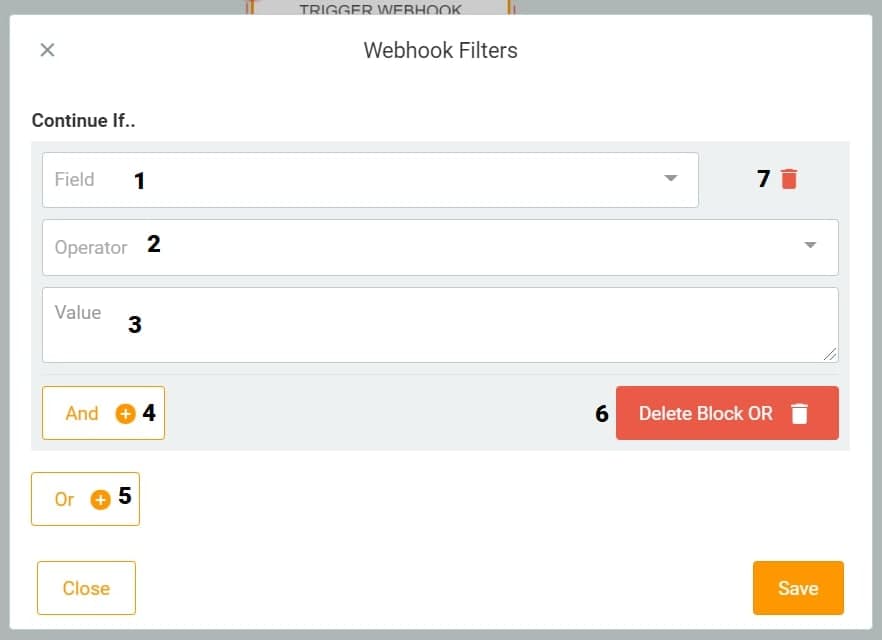
Overview Filter There are several areas Here are some area and button functions you need to know in the filter
The Webhook filter also has several rules for creating data criteria based on the type of data.
Text Equal: The retrieved data will exactly match the entered value. Contains: The retrieved data contains at least the filled value. Not Contains: The retrieved data is data that does not contain the data contained in the value.
Numbers Less Than: The data taken is data that is less than the entered value. Less Than Equal: The data taken is data that is less than and equal to the value filled in Grater Than: The data taken is data that is more than the value entered. Grater Than Usual: The data taken is data that is more than and equal to the value filled in
Date Equal: The data taken is data that matches the value filled in. Less Than: The data taken is data that is less than the entered value. Grater Than: The data taken is data that is more than the value entered.
To make it easier for you, here we try to create an example for Filtering.
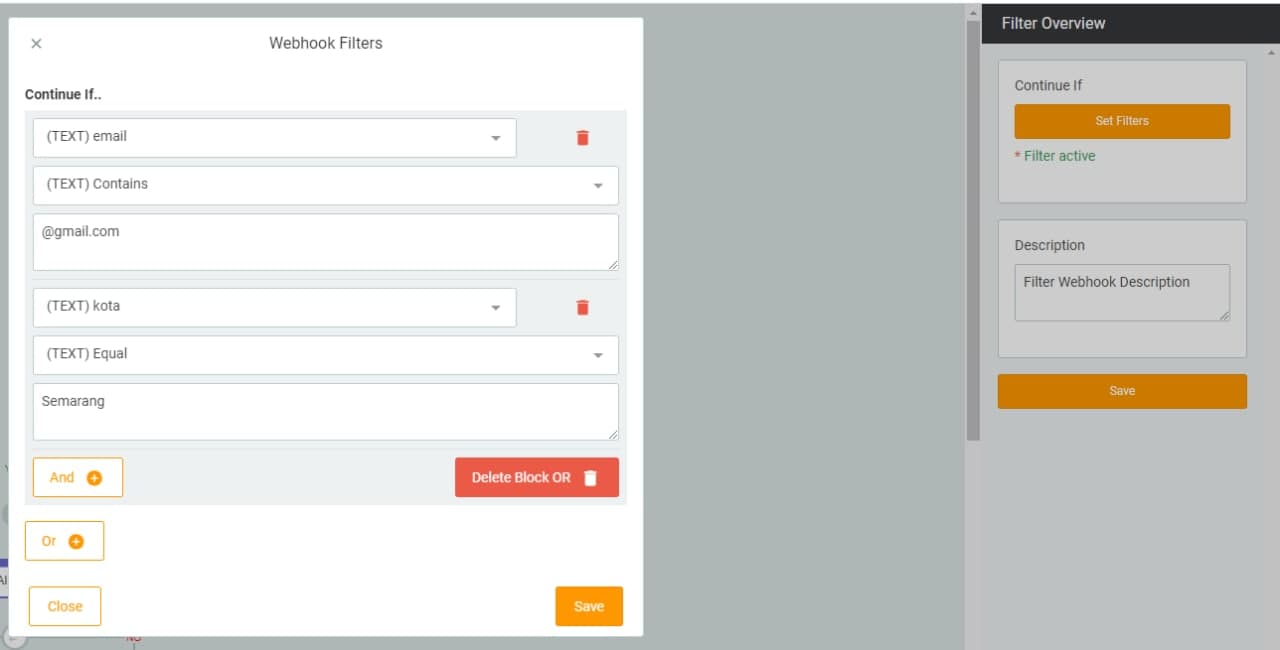
From these filters, there are 2 filtering criteria. The first filter is data containing email @gmail.com, and only the value ‘Semarang’ will be entered. The second filter, i.e. data containing @outlook.com emails, will be entered.
Make sure the value in one field contains only one type of value. So, suppose you want to filter on the ‘City’ field with the value ‘Semarang, Jakarta’, will make the incoming data will be detected as failed. So make sure there is only one value.

Unlike Trigger, here you need to include your webhook link. So later when there is incoming data from the Flow Campaign, with the Action Send Webhook command, it will send the incoming data to the Webhook that you include in the Action. You can also add additional data in the ‘Extra Data’ column.
Example Case Case: Every data that the user gets, also wants to be recorded in their apps using the Webhook they provide. How to solve: Any incoming data via Webhook (Trigger Webhook), will be automatically sent using the “Action Send Webhook” node. Here the user will enter the Webhook they use and fill in the “Extra Data” to add data from each incoming data.