Let's See How They Improved By Using Our Products
Learn how our customers increase their leads and revenue through personalization and many other features. Check their stories!
Integration of Page with Facebook Ads
In this article, you will learn to take advantage of using Page from MTARGET, with Facebook Ads that will help your Page distribution. This integration aims to target Ads to the right people through the data you already have. So, later you will be asked to upload the email data that you have from the MTARGET Contact Book. After that, Facebook will analyze the email data to find new people who have never known your ad, with the same characteristics as the email contact that you upload.
This is certainly beneficial for the Page that you have created at MTARGET. Here are the steps:
The first thing you can do is maximize the use of Facebook Pixels. This is so that later after your Page is inserted into Ads, you can read the parameters. To integrate Page with Facebook Pixel, you can read it here
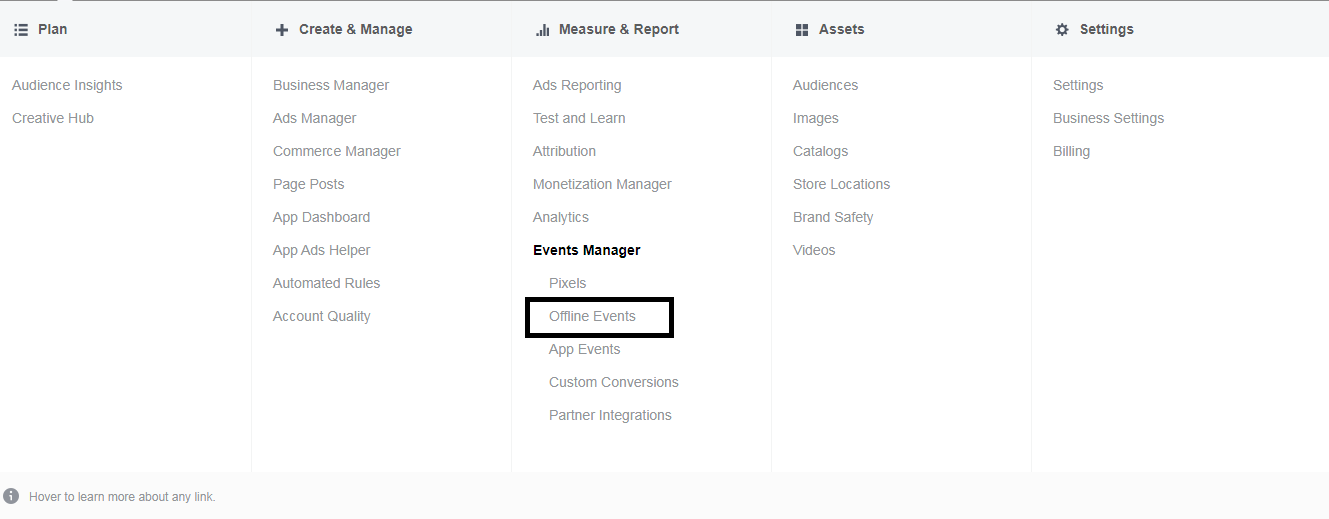
After you have successfully integrated your Page with Facebook Pixel, the next step is to click the dropdown button in the top left. In the Events Manager section, click Offline Events.
Make sure you have Customer Details, Event Time, Event Details in your file. Once you are sure all the requirements have been met, upload your CSV data. Then click the “Next: Map Data” button
If from the upload process there are requirements that have been successful it will be marked with a checklist, while requirements that have not been fulfilled there will be no checklist. After these 3 requirements are met, click the “Next: Review” button
Here your file will be reviewed and a summary of your data will be displayed. So, you can see which lines have errors and such. If you are sure of the file to be uploaded, click the “Start Upload” button.
After that Facebook will process your data. The more email contact data you have, the longer the process. Wait until the data process is complete.
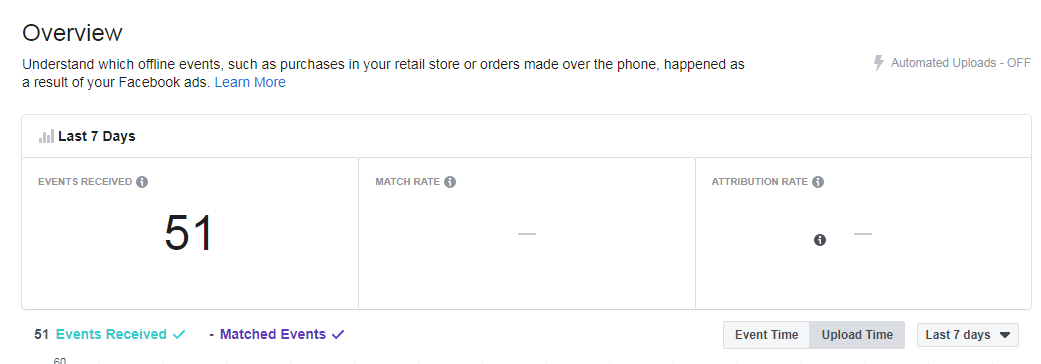
When finished, the Offline Event menu will display an overview like the following.
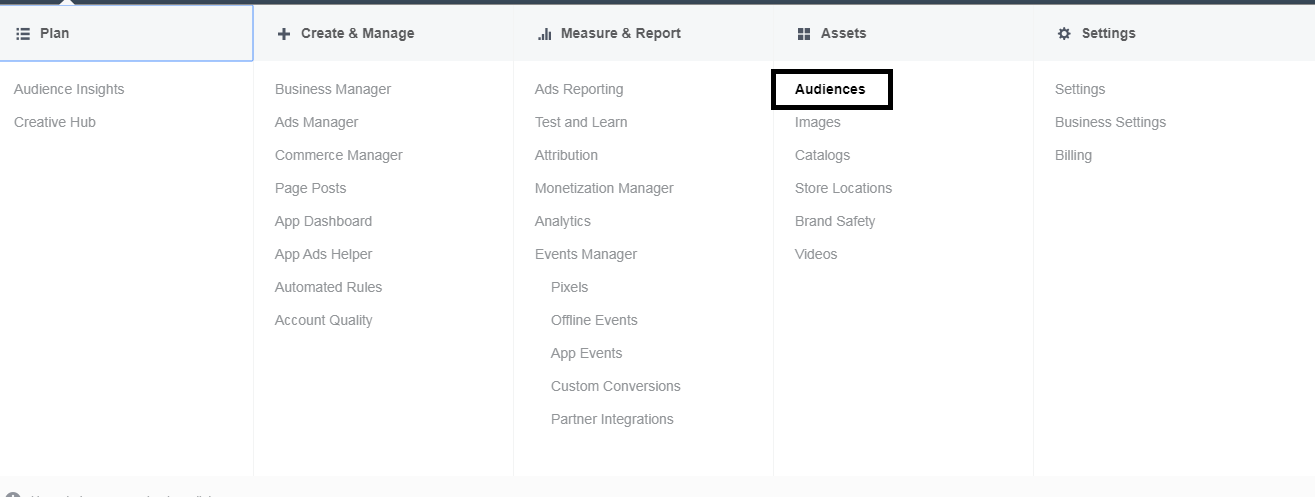
To see if your Custom Audience process has finished, you can check it by clicking the Dropdown button at the top left, then select Audiences.
If your Custom Audience table still says “Pending”, then Custom Audience data is still in the process stage. If the Custom Audience data is ready to use, you can enter the Offline Event that you created earlier.
Note: Here, your data will be analyzed by Facebook to look for new visitors with personal data similar to the contact data that you have previously uploaded.